Customise the EspDesktop touchscreen layout
Home is the main screen on your EspDesktop touchscreen. Open your display’s address in a browser and select Layout to arrange the cards you want within easy reach.
Organise cards
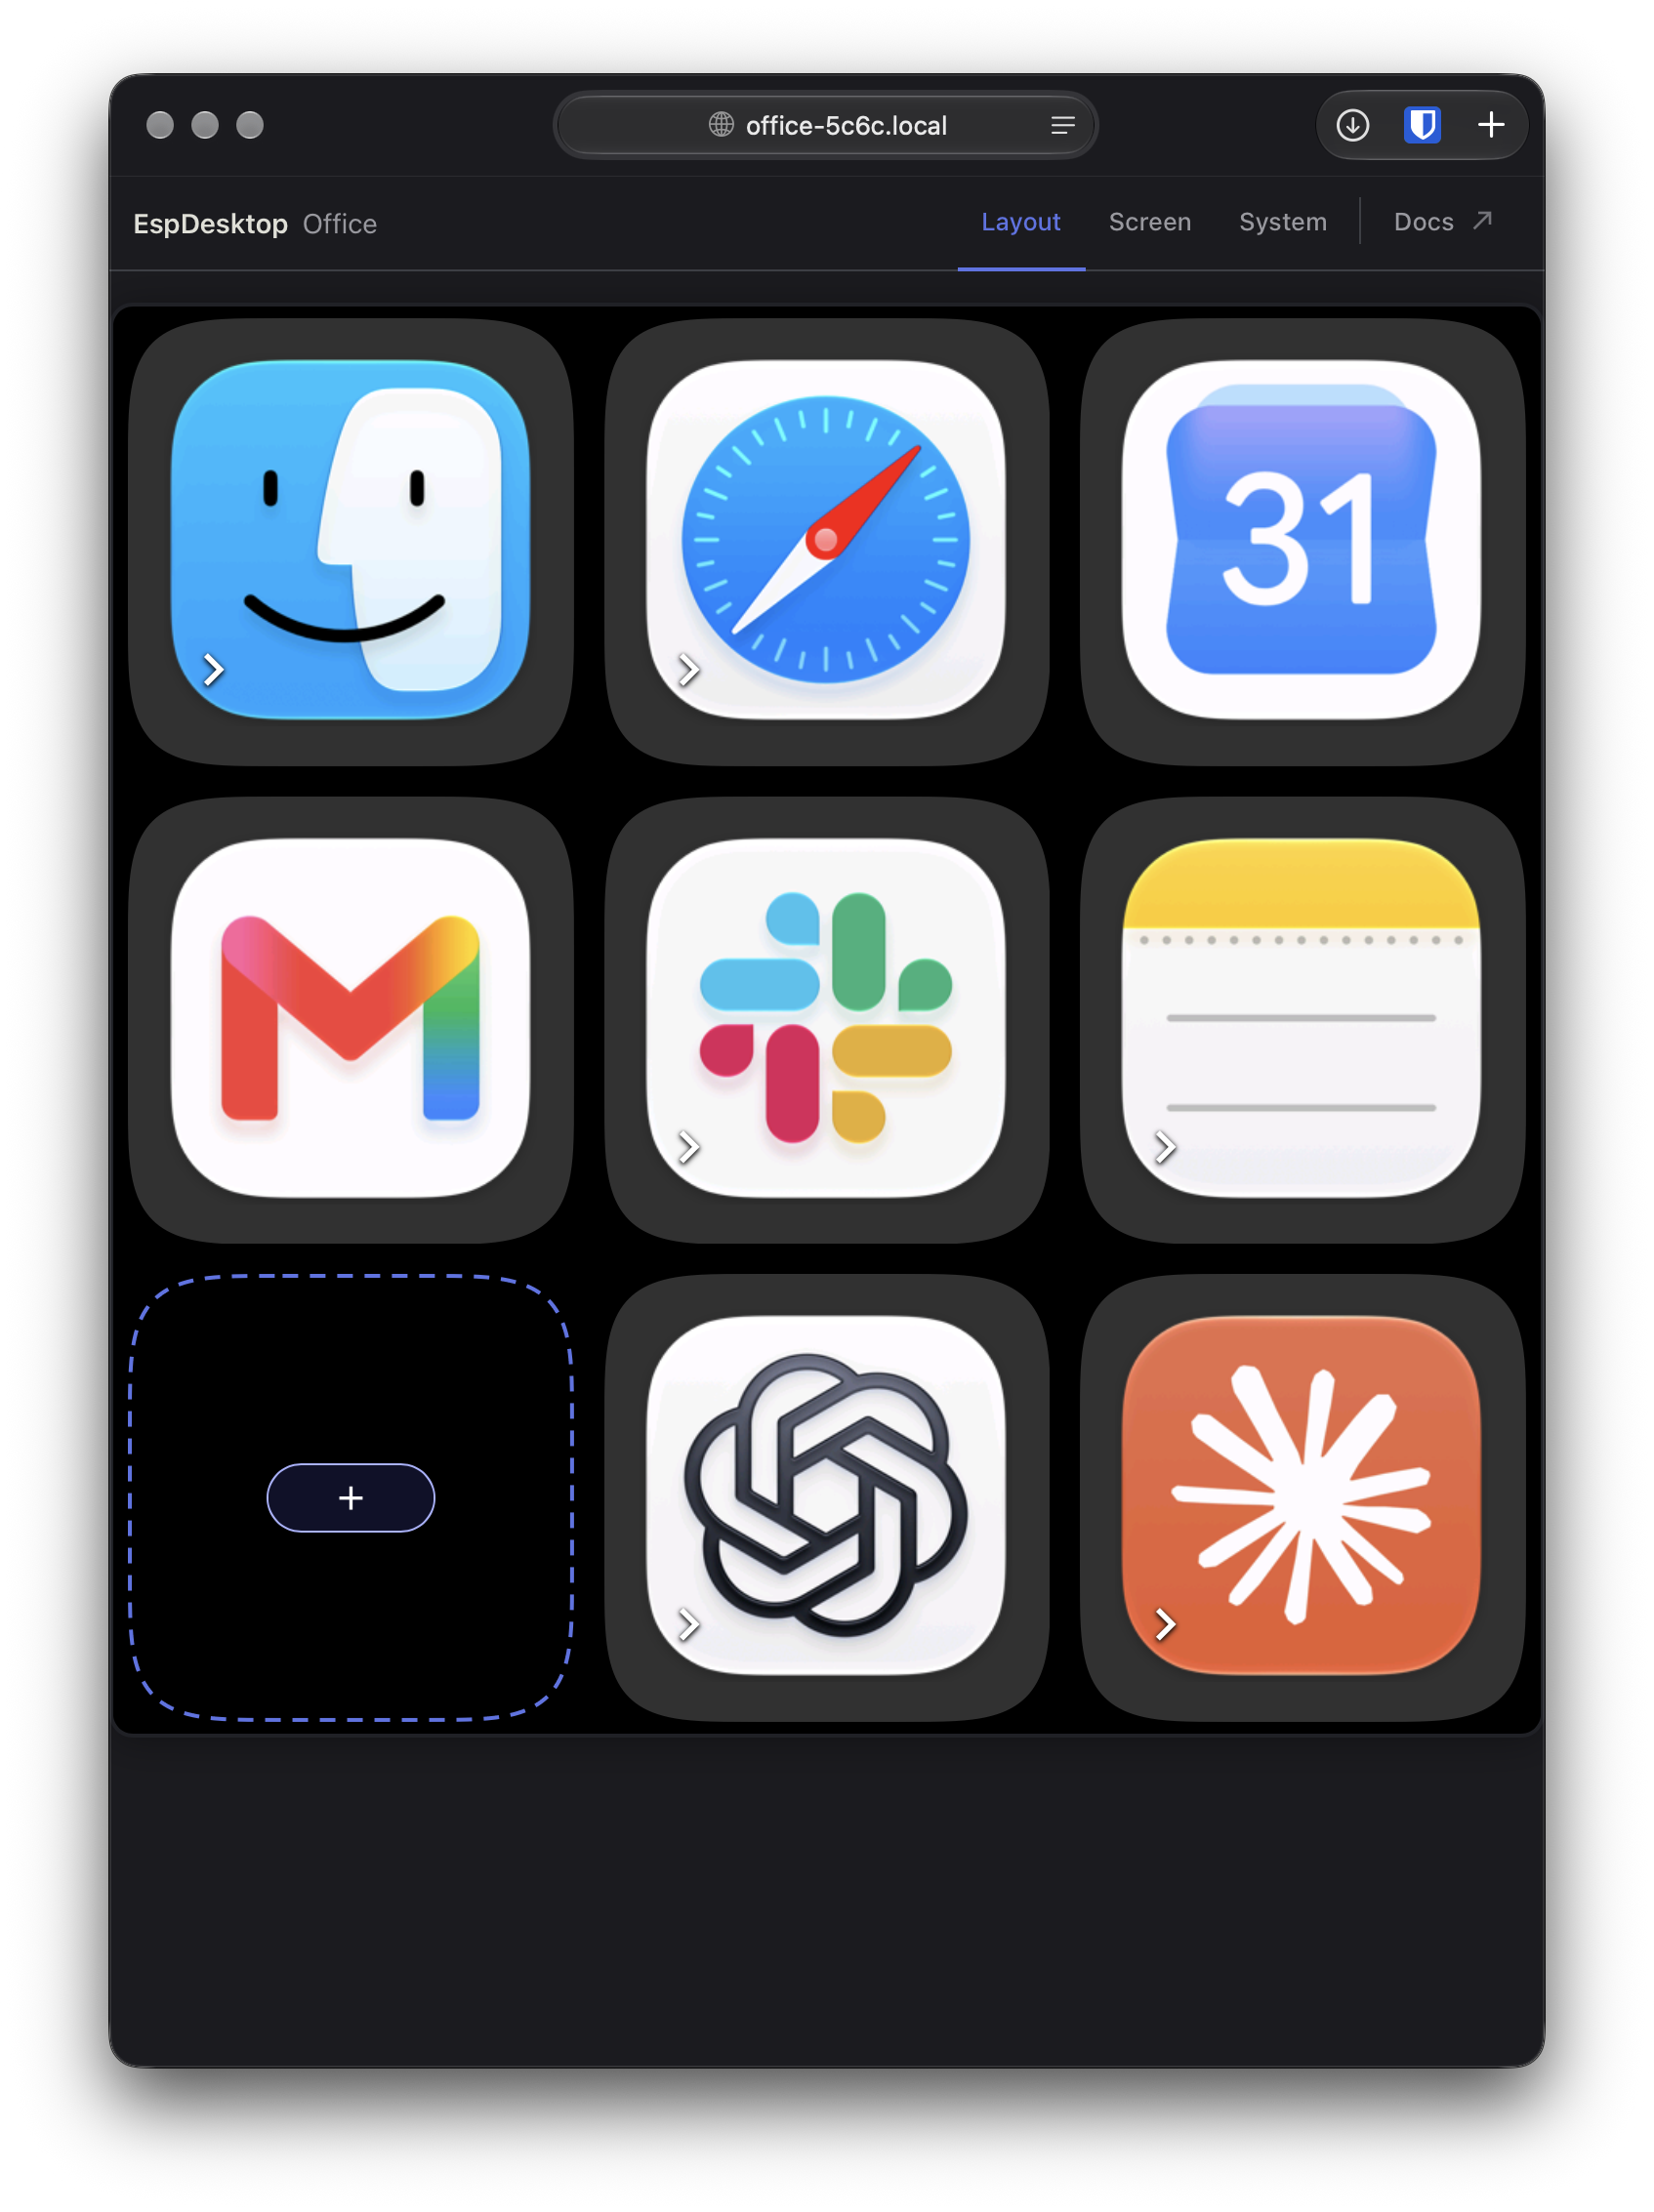
Move a card. Drag it to another spot in the grid. If you drop it onto another card, that card shifts to the next available space.

The blue outline shows where the Slack card will land. Resize a card. Hover over it and drag the handle in its bottom-right corner to make it wider, taller or smaller. The available sizes depend on the card and the space in the grid. Press Escape during the drag to keep the original size.

The white curve on the Slack card is the resize handle.
Moves and resizes save when you drop the card or release the handle. Choose Save when editing a card.
To move or copy a card between Home and a subpage, right-click it and choose Cut or Copy, then right-click an empty tile on the destination page and choose Paste. Clipboard actions save the layout as you make them. You can also copy a card’s code to use it on another display.
Change how a card looks
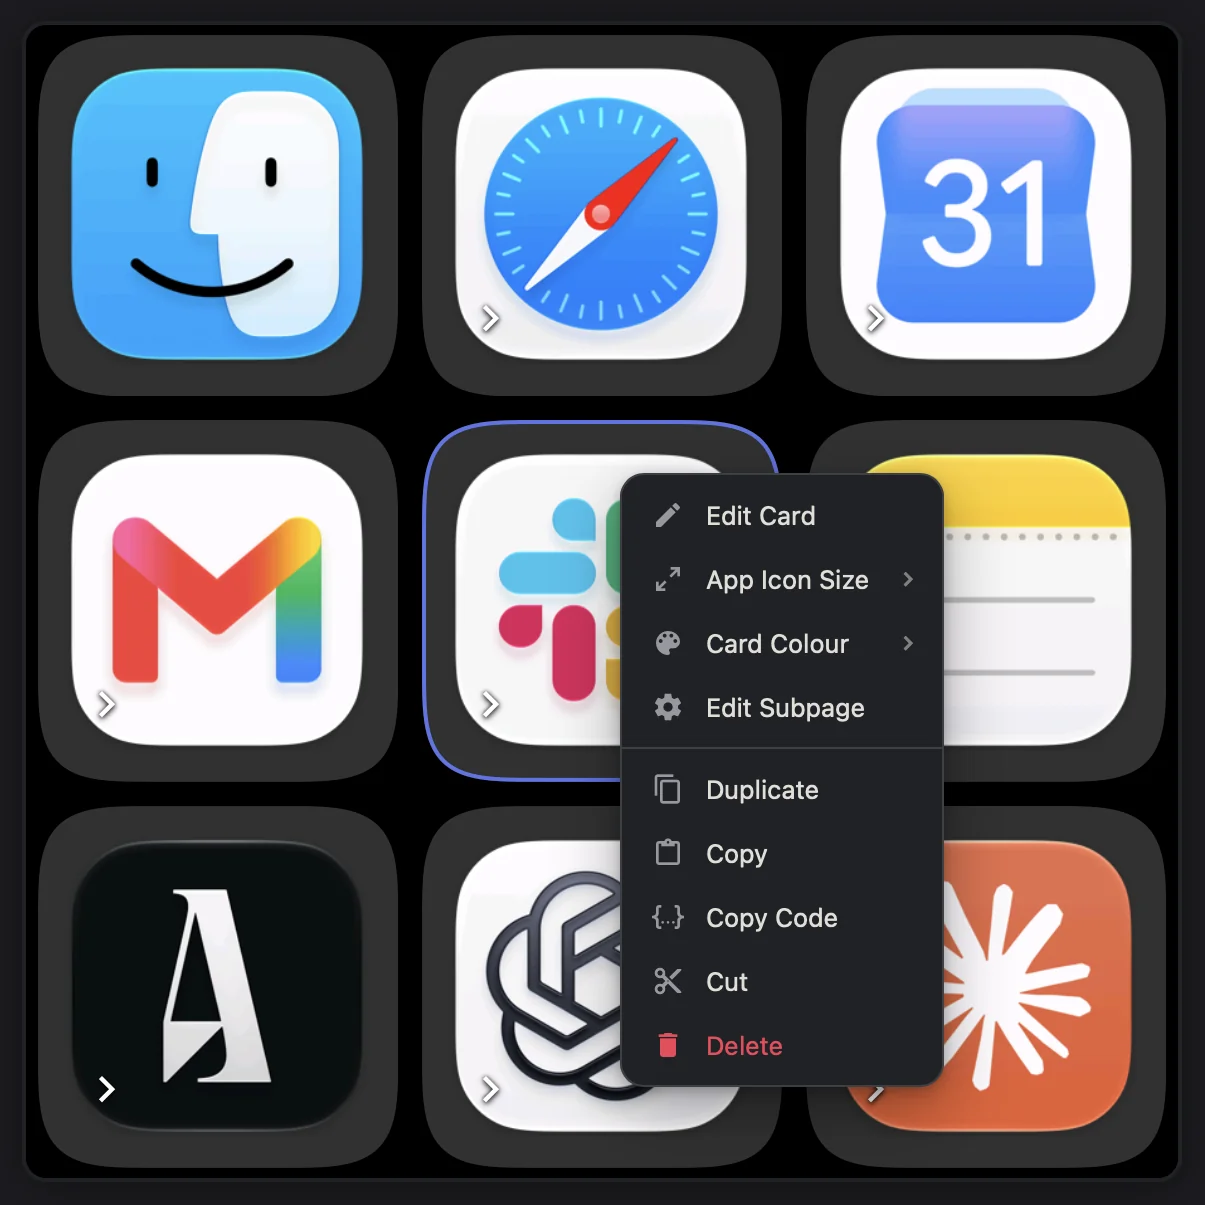
Right-click a card to open its menu.
- Name. Choose Edit Card, change the Label, and select Save. You can also click a visible card name in the grid, type the new name and press Enter.
- App icon size. Choose App Icon Size and select Small, Medium or Large. Large fills the card with the app icon and hides the label.
- Background colour. Open Card Colour and pick a preset or use the eyedropper to choose a custom colour. Choose Reset Colour to restore the default background.
Add a card
- Click the + in an empty spot on the grid.
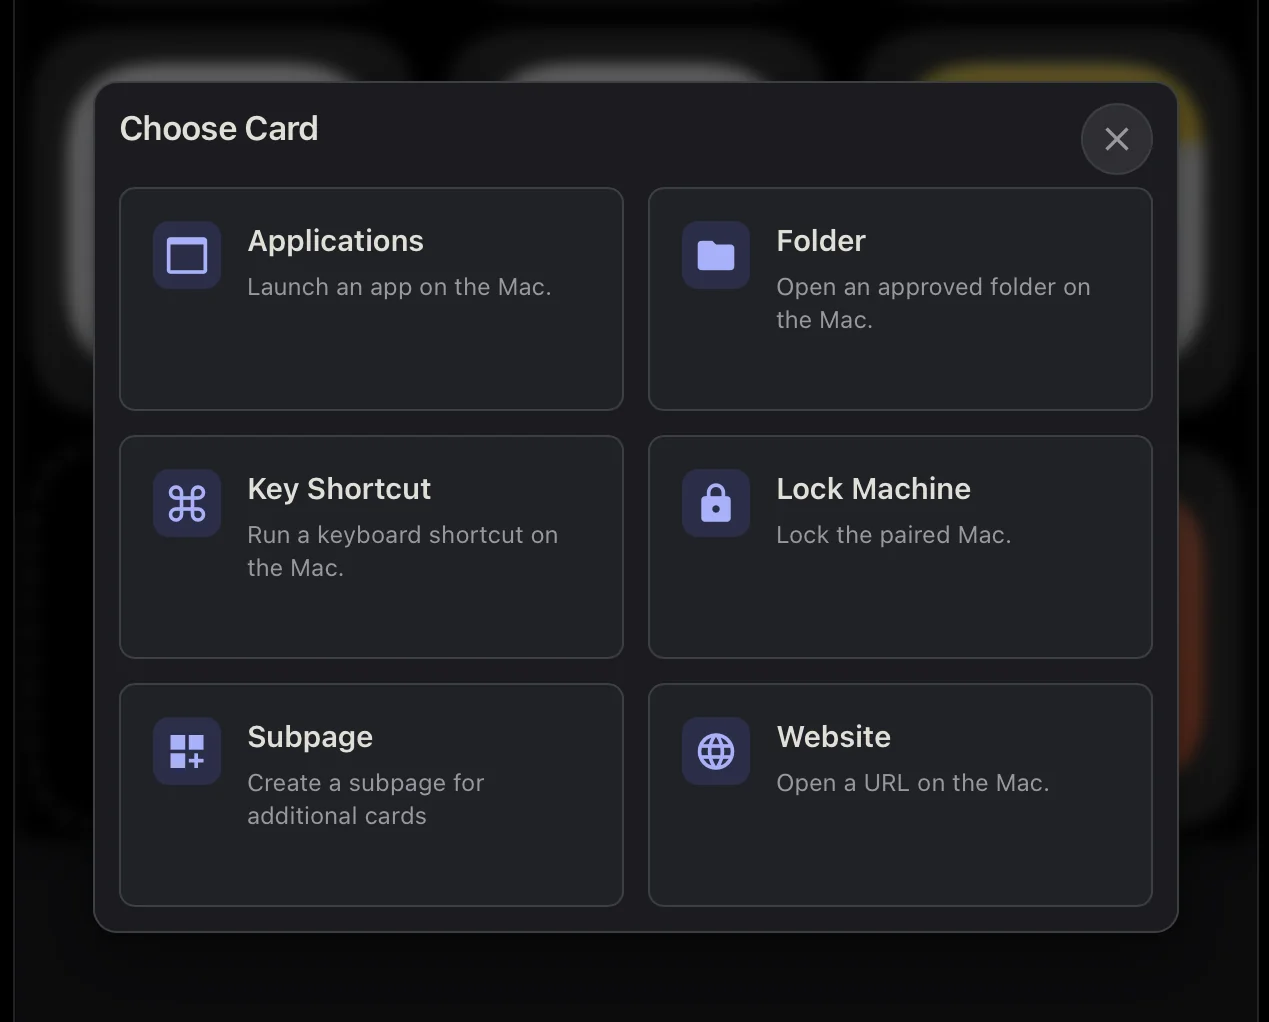
- In Choose Card, pick what the card should do. For example, choose Applications to launch a Mac app, Folder to open an approved folder, or Key Shortcut to run a keyboard shortcut.
- Fill in the settings for that card and select Save. The card appears on your touchscreen.
Create a custom subpage
Group related cards behind a single card on Home. For example, create a Work subpage for Slack, your calendar and a project folder.
- Click the + in an empty spot and choose Subpage.
- Give it a label and an icon, then select Save.
- Right-click the new card and choose Edit Subpage. Add, move and resize cards in its grid as you would on Home.
- Use the Back card to return to Home. On the touchscreen, tap the subpage card to open it.
See how to add nested pages and organise app-specific shortcuts in the Subpages guide.
Use and customise the Back card
To customise a Back card, edit its name and colours in the editor. Its default and active colours are saved with the subpage and included in backups.
Subpage and Back buttons change page as soon as you touch them, without waiting for a highlight or release. App subpages with automatic opening enabled also open immediately, without waiting for the Mac to confirm focus. In manual mode, the first press still focuses the app and a later press opens its subpage.
Returning with Back or a swipe shows the destination page before loading any missing app artwork. Cached icons appear straight away; other icons can appear shortly afterward.